Now the track is off, it’s time to repair the damage caused by the corrosion.
The ideal solution would be to replace the complete teak planks in the area of the damage. Unfortunately time and the weather were against us, so a little bit of ingenuity was required.
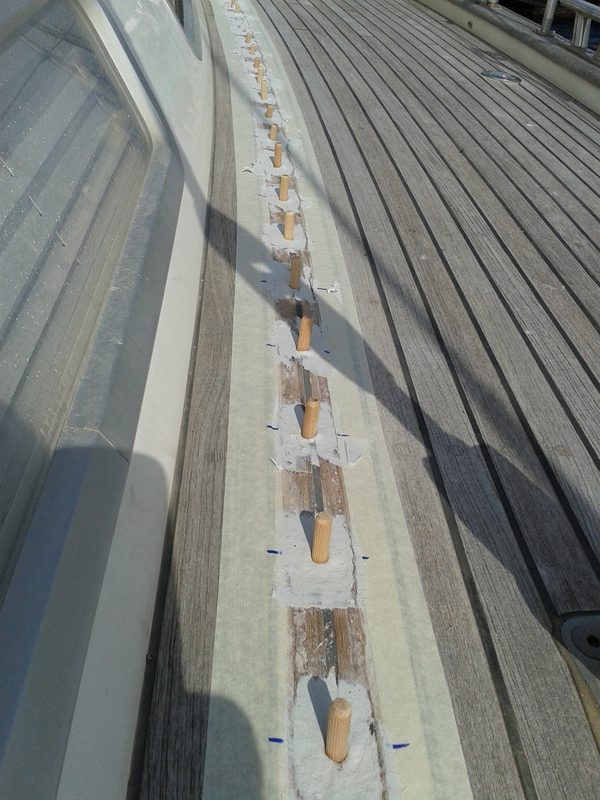
Masking tape and filler. 
Plugs to keep holes clear… 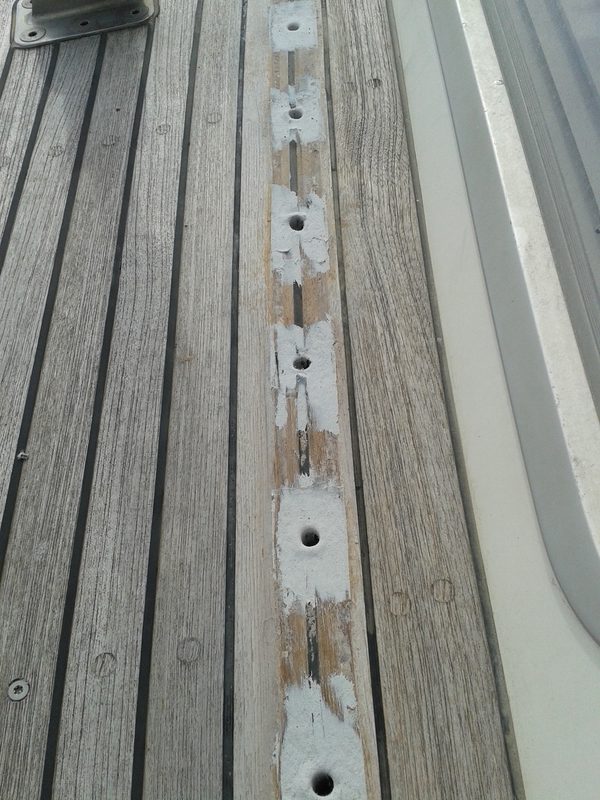
..and ready for new track!
First the area around the holes was cleaned of dust and masking tape applied. Then car body filler paste was carefully applied attempting to keep things level with the good teak. After the filler was applied, but before it cured, wooden plugs were pushed through to [hopefully] keep the bolt holes clear. Marks on the masking tape showed where the holes were.
During this time the interior of the boat was covered with sheets to try and prevent the debris getting everywhere.
When the filler had cured the plugs were either pulled out or tapped through into the interior. Only a couple were stubborn and had to be drilled out.
A “best effort” was made to sand the filler so it wasn’t proud of the deck but as it was going to get covered anyway I didn’t spend so much time doing this.
Hopefully further down the line we can have the affected teak planks replaced.
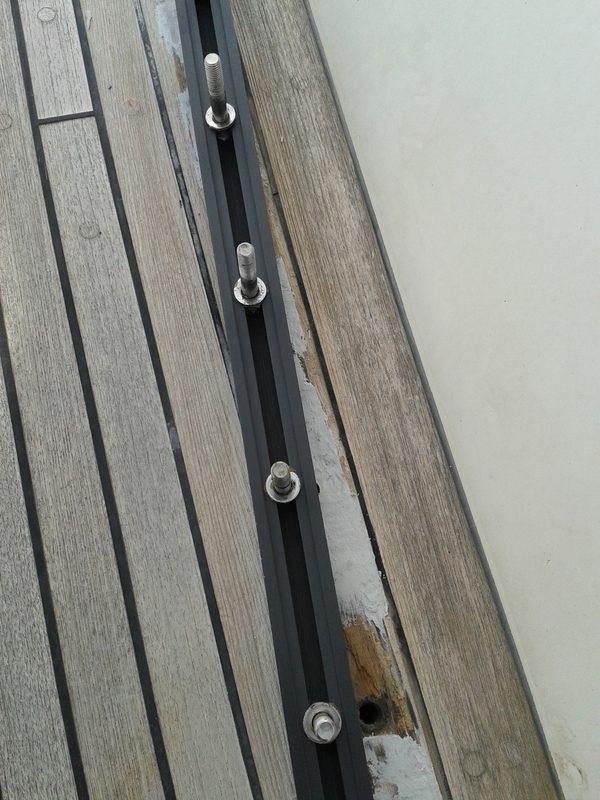
This is the new track waiting anxiously to be fitted.
The bolts are roughly in the right places.
In an attempt to stop or least reduce the possibility of corrosion between the stainless washers and the track I made insulating washers out of brown package tape (!!) You can’t see it in the picture, but it was there underneath each washer!
The correct solution would have been an insulating paste such as “Duralac” but the local hardware shop (no chandlery on the island) didn’t have anything like that.
If we ever get the teak replaced then there will be Duralac everywhere…
So then the fun began…I needed to put Sikaflex (silicone sealant) on to each washer to provide a waterproof seal. You could try to put it in the holes but I reasoned all that would happen is the sticky Sikaflex would get poked through into the interior (Sikaflex is notorious for getting everywhere anyway) and each bolt had to be individually lined up and pushed into the corresponding hole. The chance of ending up with a complete mess on the deck was dauntingly high. Plus the track had to be curved to follow the line of the boat and I could see that the bolts would pop out of the holes and smear Sikaflex everywhere 🙁
I opted to apply the Sikaflex as I went along.
This was probably NOT the best way to do this, but I couldn’t think of a better way.
I applied the Sikaflex around the bolthole and bolt, but not so much on it (the bolt).
So the sequence was:
* Coax several bolts into the holes without them springing out
* Apply a good amount Sikaflex around the bolthole
* Push/press the the relevant bolts into the holes a bit more
* Repeat for the next bolts in line
With this technique and some reasonable knee pressure (via a foam pad) eventually all the bolts were in the holes and the track took up the required curve.
At the beginning there was a tendency for the bolts to jump out of the holes but the more that were done the less this happened.
It was really important to make sure that the position of the track lengthways was correct initially as once more than a few bolts are in it was impossible to slide the track along. I found that out the hard way.
Once all the bolts were in the holes and the Sika applied I simply walked carefully along the track pushing it home
Almost there – it was nice to see the Sika oozing out from under the track. A good sign that I’d used enough (mostly).
The tape indicates where a shorter bolt had been located.
The next job was to refit the myriad of washers and nuts, tighten and check. After the initial tightening I left the whole thing overnight to allow the Sika to cure. I checked on-deck that pleasing amounts of Sika had oozed out – it was about 90% OK 🙁
(Note: Leaving the Sikaflex to cure also means it’s easier to remove)
Next morning I tightened all the nuts again, again, then again…and again. Each time you’re compressing the teak and Sika so this has to be done several times.
The big test was the first rain. In fact we had a lot of rain in between which was another problem when you have 37 holes through the deck.
When I said 90% were OK I meant it. After the rain I found 4 bolts were leaking slightly. A combination of more tightening and “Captain Tolley’s Creeping Crack Cure” (honest!) seems to have cured that…at least last time I looked.
(When I feel brave I remove the headlining and check the security of the nuts – they still need tightening but not as much as before)
So the final job was to refit the headlining and the deck hardware.
Then I could start the other side….

Great…this side is much.. 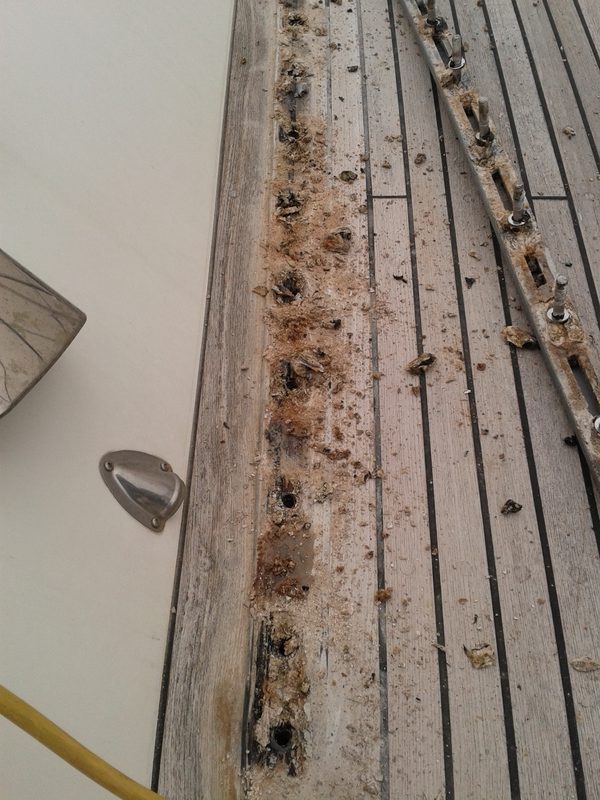
..much worse. 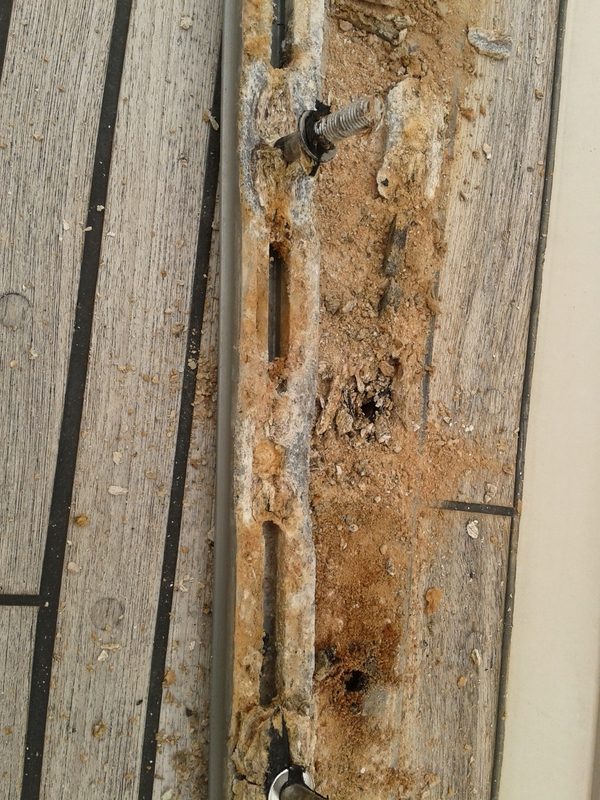
Rats… 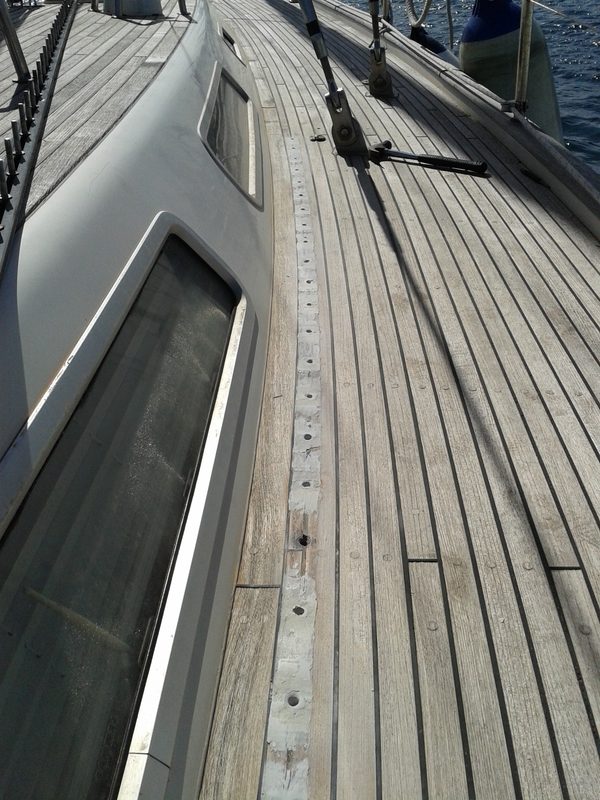
ONE hole was OK! 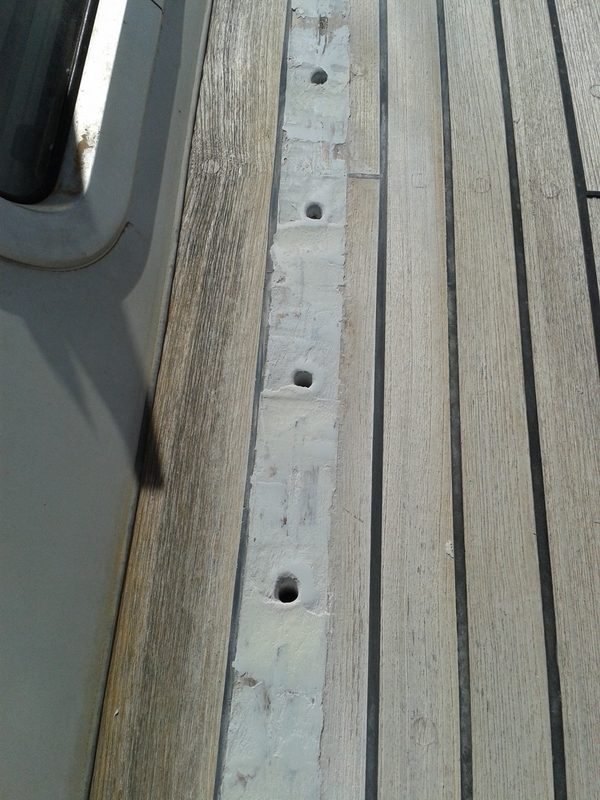
I’m better at this now. 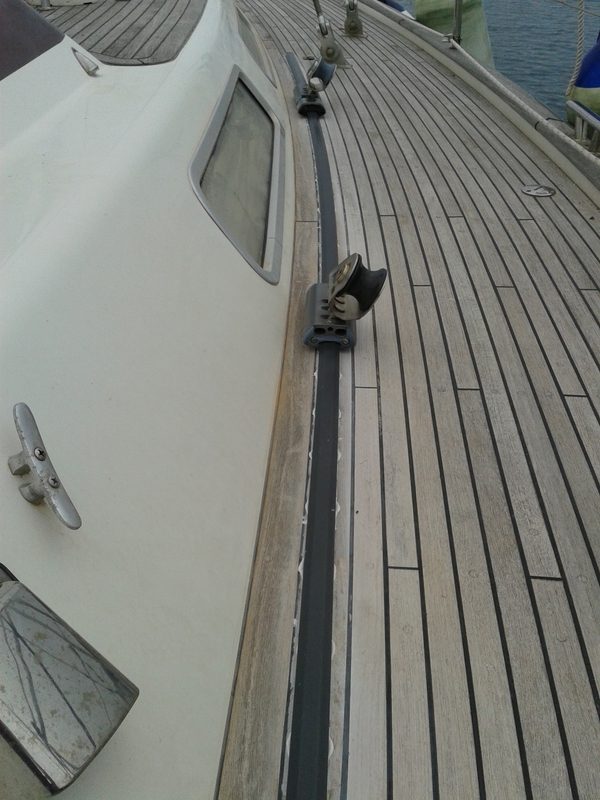
Finished!! Beer time…
Final thoughts…
I spent a lot of time extracting the original bolts from the old track, which was a difficult and time consuming job. It would have been easier and quicker to buy new ones (thanks, Captain Hindsight) but they were not available on the island.
I should have used Duralac on the track to prevent this from happening again but, once again, this was not available on the island. Next time…
I had allocated 4 days for this job and in the end it took nearly 2 weeks. My defence is that there were a few “rain stopped play” days…and I was on my own for the second track.